
First, if you haven't seen Frozen, watch it, it is great, Sven is my favourite character..!
See the end of the post for more Elsa Dresses and a hairband!
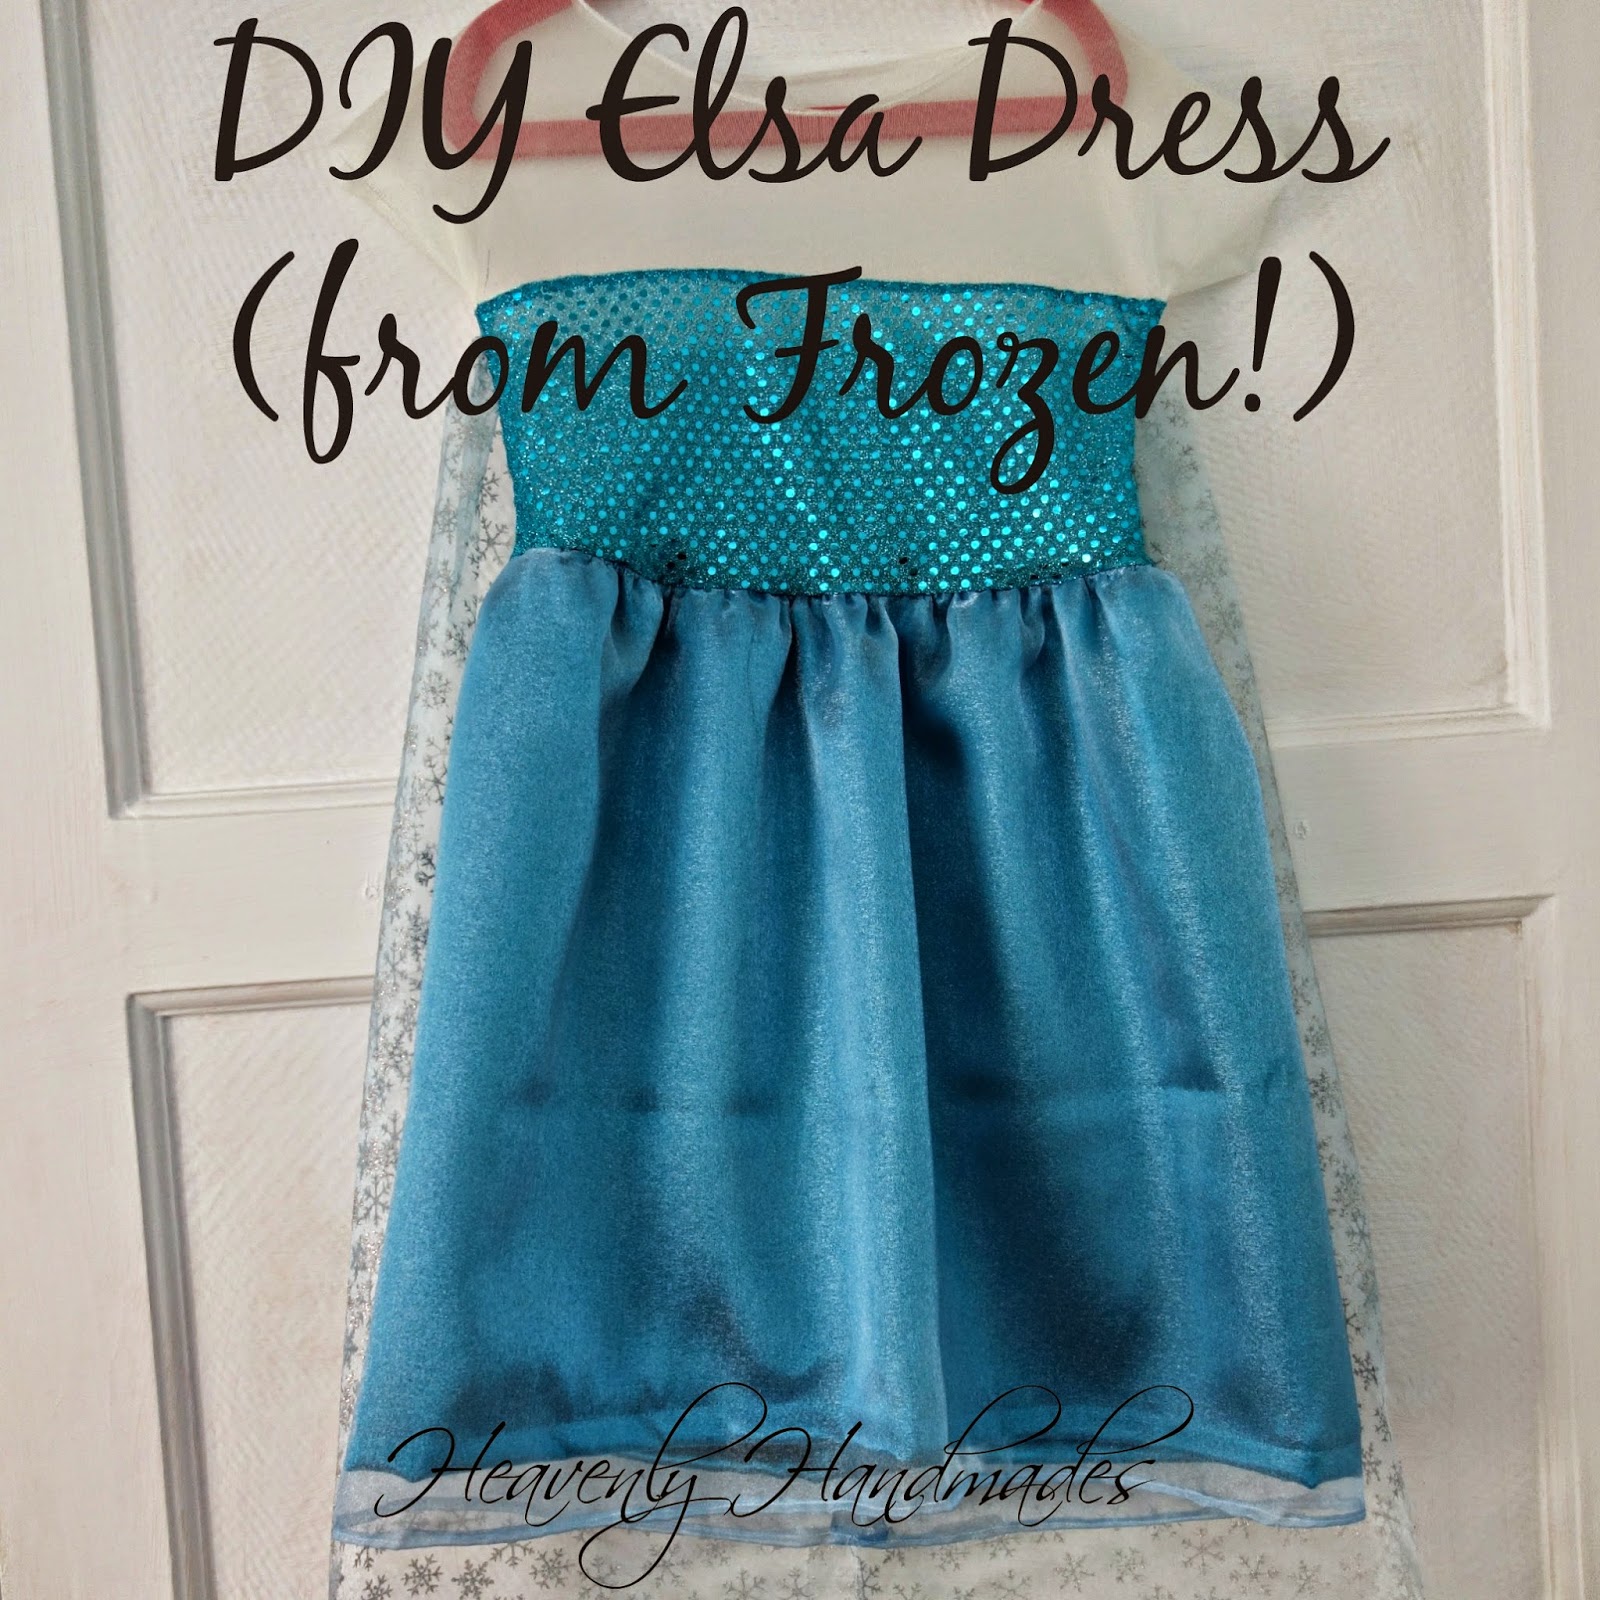
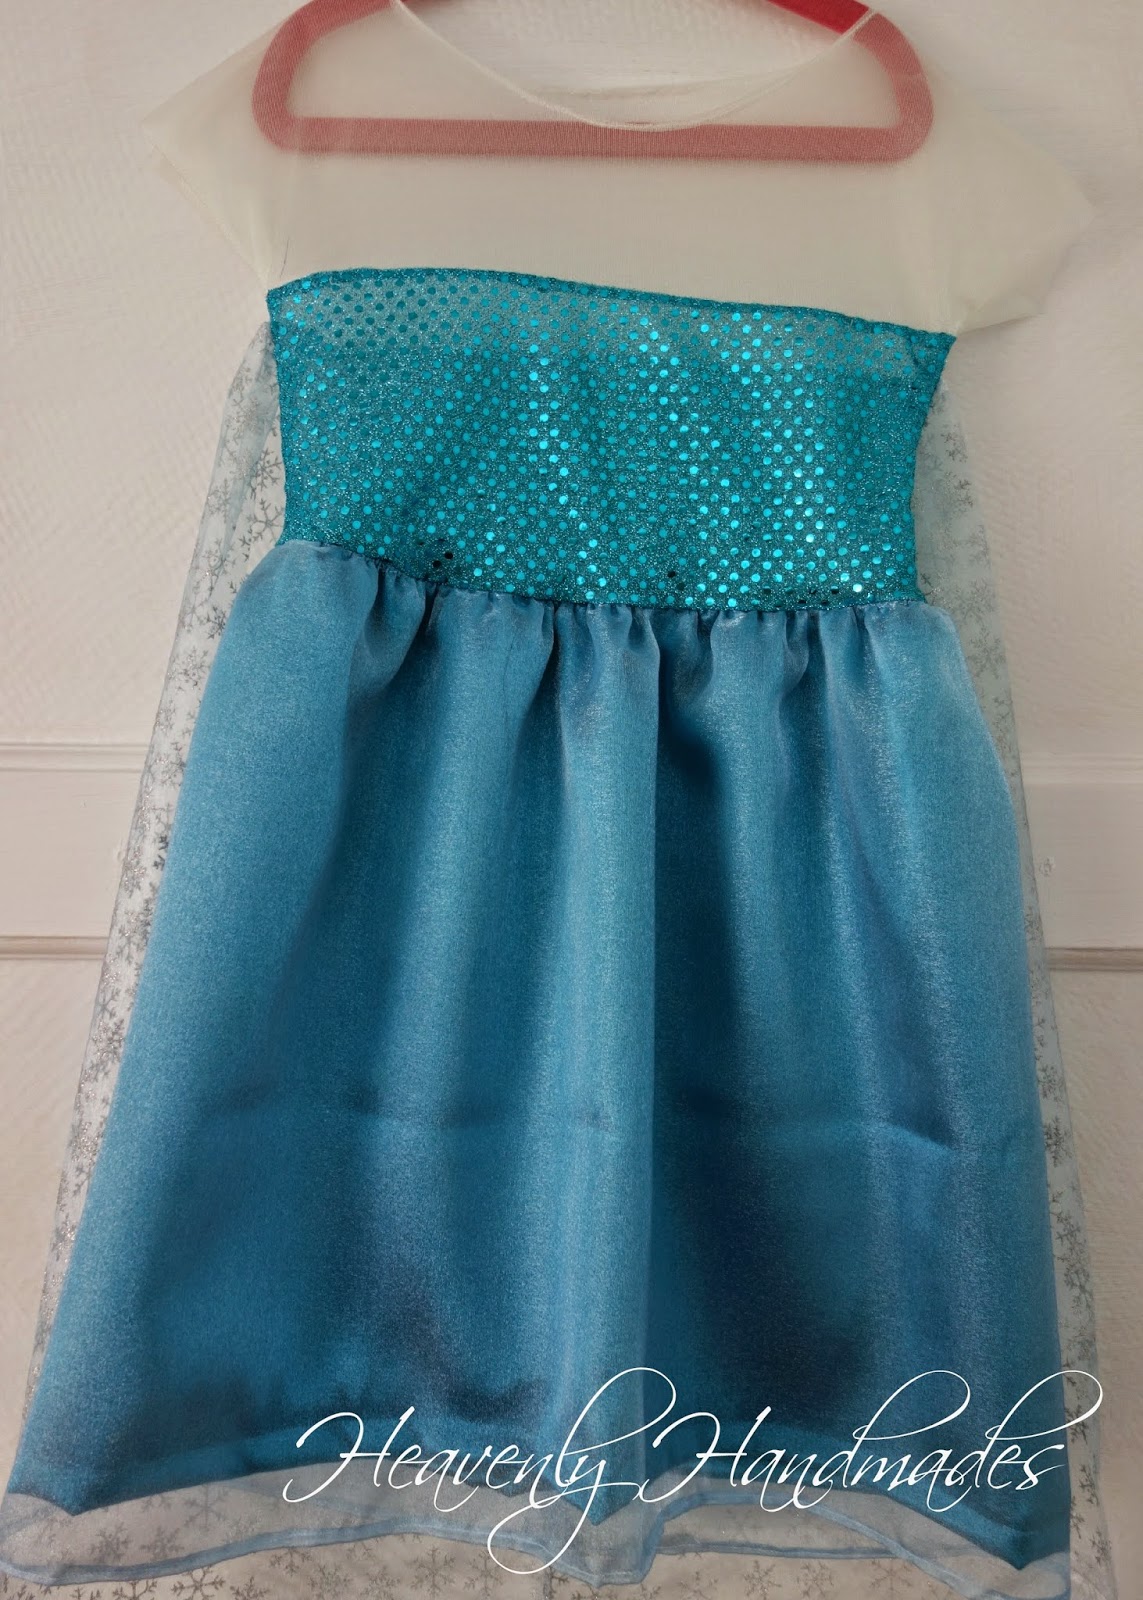
I asked a friends daughter if she could dress up as anyone who would it be...her reply, "Elsa of course!" I knew what I was making for her 5th birthday!

I had to use a lot of creative license here as really this is a slinky dress for a lady with curves but I gave it a bash.
It started with a mass purchase of fabric from ebay:

Snowflake organza,

turquoise stretchy sequined fabric (1m), sheer ivory stretchy fabric (1m), pale blue crystal organza (2m) and turquoise stretch satin (2m). The whole lot set me back £24 and is enough to make 2 dresses, considering the dress from the Disney shop is £40 it was a bargain!
You will also need about 30cm of decorative elastic and (waist size x 2 and a bit ) of narrow fairly light weight elastic.
I didn't have a suitable pattern so used an old t-shirt to make the pattern, here is the 'how to':

If your t-shirt has a collar cut it off then cut straight across just under the arms and cut it to the length of a correct size dress bodice ( I chopped about 3 inches off the bottom of this one). Get rid of the very bottom piece.

Cut the shoulder seams and up the centre of the sleeve and cut the remaining side seams.

Fold the pale stretch fabric so it is double layered. Pin the top and bottom section to the ivory (should be pale blue but I couldn't get any..). Here I used the back top piece as it needed a high neckline.

Here is where you have to wing it a little...
Cut round the t-shirt leaving a seam allowance all the way round. Extend the arms to full length.
(Aside: I ended up chopping the arms off, the final dress has short sleeves, because the fabric was only a one way stretch, check yours is 2/4 way before you go long sleeved...!)

Take only the lower portion of the t-shirt and cut out the sequin fabric (folded so you get 2), again leaving a seam allowance.

Take a bodice piece and pin the sequined piece to it, right sides together but with the sequins extending over the top of the bodice:

Stitch it in place and then flip it down:

Do this for the other bodice piece then place them right sides together and sew up the side and arm/shoulder seams, matching the sequined parts of the bodice.
It was this point I realised the stretch, or lack of it, issue and chopped the sleeves!

Next, take your Snowflake organza and cut it to length (under arms to floor on lucky recipient). My organza was narrow so it was just under twice the width of the bodice.
Take your decorative elastic and cut it to the width of the back bodice

You are now going to sew the organza on to the elastic while stretching the elastic so it is the same length as the organza is wide. You will have to hold front and back as it goes through the machine as it pulls on the needle otherwise.
Then take the organza on elastic and sew with a stretch stitch on to the bodice. I positioned it just under the seam line for stability.

Next you need to cut the fabric for the skirt. Lay the satin and pale organza on top of each other and cut them into a large rectangle, the width depends on how wide you want the skirt, mine was 46 inches, and the length entirely depends on the person it is for! I made mine calf length so that there is no tripping!
Join each piece of fabric individually so you will have 2 tubes. Place the satin inside the organza.
Take some narrow, fairly soft, elastic and sew it on to a loop that is waist sized.
Then, using the stretch and sew technique as before sew the 2 layers of skirt to the elastic (elastic on the inside).

You will end up with this:

Trim any stray threads (if your fabric is like mine there will be millions!) then put the bodice inside the skirt, right sides together, and stitch them together. I used a stretch stitch and sewed in the elastic then overlocked the raw edges.

Lastly hem the skirts, neck and arm's. I used a rolled hem for the bodice and the normal fold 0.5cm then fold again 1cm hem on the skirts.
Turn the dress the right way out and give it a shake!


The waistline will always be a little lumpy as there is elastic there but it is a dressing up costume, stretchy enough for kids to take on and off themselves and that is all that matters!

Recruit a willing model (bed head optional) - little e is a lot taller that the little girl it was for so it is very short on her..


It must be ok, little e now wants one of her own and the little girl it was for declared that she loved it, phew!
Edited 30/12/14: I have made another two different Elsa dresses and a hairband, click on the pictures!


Linking to some of these fab linky parties.


Beautiful
ReplyDeleteCarolx
This is amazing! We've not seen Frozen, but from the photo this looks pretty accurate! I think any of the girls in Small Boy's nursery would kill for this! And quote possibly SB himself...
ReplyDeleteHow cute, my granddaughter would love it. Pinning for her to see if she can sew it :)
ReplyDeleteThanks for sharing!
I haven't seen the film yet either, but so many adults say it is a must see, so I am sure I will get to see it someday. What a lovely gift idea to make a costume! It looks really sweet, and if little E wants one too then it must be lots of fun to wear!
ReplyDeleteP.S. Love the bed hair - reminds me of my own childhood!
My daughter adores this movie and walks around the house singing the songs and spinning around. She would LOVE this dress. I made her an Elsa-inspired cape (not as cute as your dress) and as soon as I gave it to her she asked for a matching dress. Good idea to use an old shirt for a pattern template. It turned out beautifully!
ReplyDeletehttp://renewedprojects.blogspot.com/2014/03/frozen-inspired-cape.html
What little girl wouldn't adore this Elsa costume!!! Great idea to use the t-shirt as a pattern. Thanks for sharing the fabulous tutorial.
ReplyDeleteFeatured today, Alison...
Delete